Picking the right Operator in Delta Force Season 10 can completely change how a match plays out. Some characters dominate massive Warfare battles, while others truly come alive in the slower, high-stakes Operations mode. Since abilities function differently across both playlists, a top-tier pick in one mode can easily fall several ranks in the other.
This tier list covers all 16 Operators, explains why each lands where it does, and highlights the strengths and weaknesses that matter most right now.
Delta Force Season 10 Operator Overview
Season 10 features 16 Operators divided into four combat roles:
| Class | Operators |
|---|---|
| Assault | 4 |
| Support | 3 |
| Engineer | 5 |
| Recon | 4 |
A few things are worth knowing before you start unlocking characters:
- New players begin with only the default Operators.
- Additional Operators can either be purchased or earned by completing Recruitment missions.
- Every Operator’s abilities change slightly between Warfare and Operations.
- Because of that, each mode has its own meta.
Best Operators for Warfare
Warfare is Delta Force’s large-scale 32v32 objective mode, where mobility, area control, and pushing capture points matter far more than stealth.
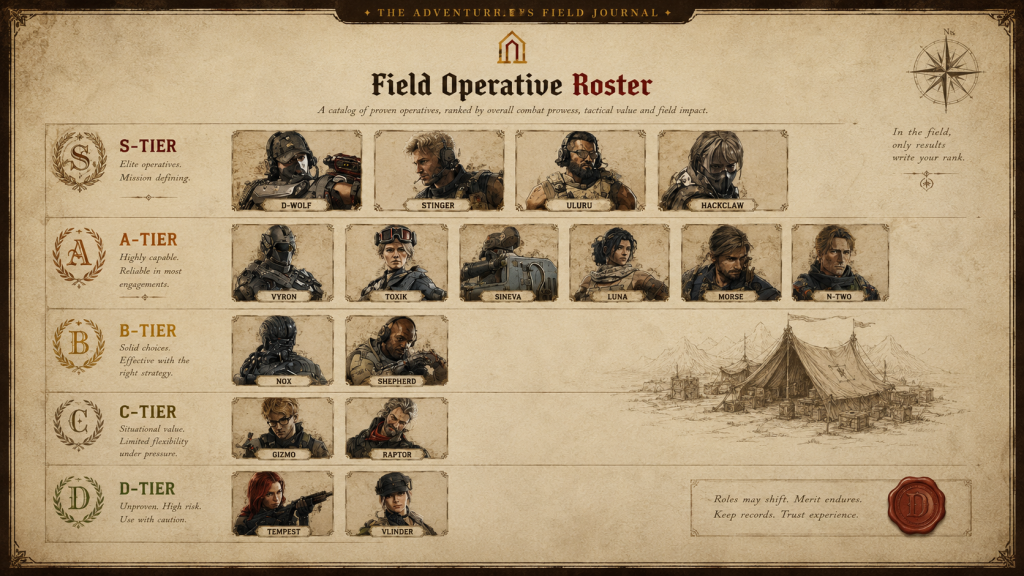
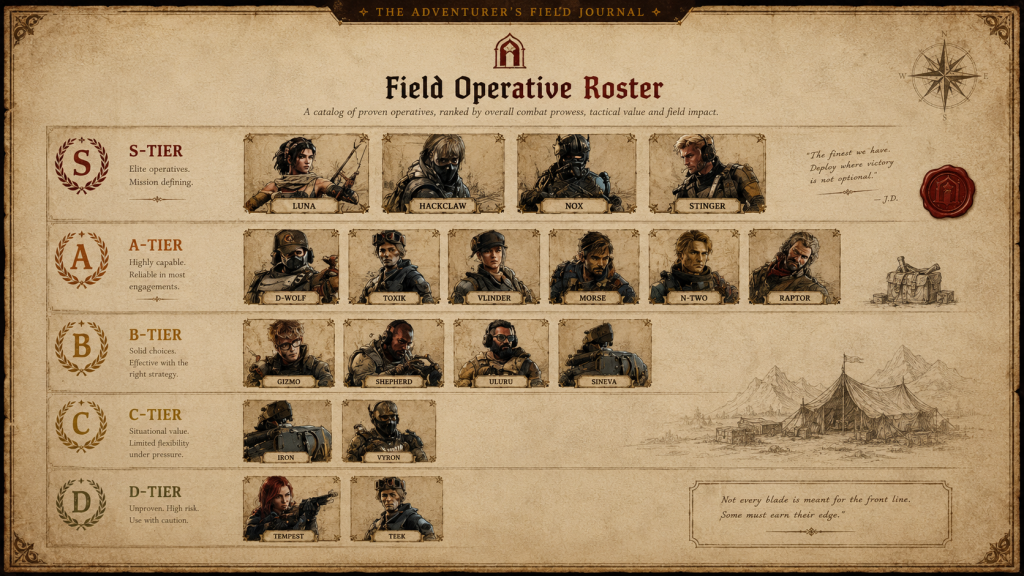
Here’s how every Operator currently stacks up.
| Tier | Operators |
|---|---|
| S | D-Wolf, Stinger, Uluru, Hackclaw |
| A | Vyron, Toxik, Sineva, Luna, Morse, N-Two |
| B | Nox, Shepherd |
| C | Gizmo, Raptor |
| D | Tempest, Vlinder |
Some placements may seem unusual compared to other community lists, but these rankings come from practical experience rather than popularity.
S-Tier Warfare Operators
D-Wolf
Abilities
- Motorized Exoskeleton
- Triple Blaster
- Tactical Smoke Grenade
- Tactical Slide
Few Operators feel as consistently useful as D-Wolf.
While many players dismiss him because his kit looks straightforward, that’s actually his greatest advantage. Movement wins fights in Warfare, and few characters reposition faster.
Motorized Exoskeleton dramatically boosts sprint speed, making it easy to flank defenders, slip behind enemy lines, or reach objectives before anyone expects you. Every elimination while it’s active restores health and extends the ability, allowing aggressive players to stay alive much longer than they should.
Triple Blaster adds another reason to love him. In Warfare it fires a single sticky explosive that behaves like a powerful grenade, giving D-Wolf reliable anti-infantry pressure while still threatening vehicles.
For new players especially, he’s one of the strongest unlocks available.
Stinger
Abilities
- Hive-Tech Pistol
- Smokescreen
- Hive-Tech Smoke Grenade
- Expertly Rescue
If your team actually wants to win instead of chasing kills, Stinger is hard to replace.
His Hive-Tech Pistol automatically tracks injured teammates, meaning healing requires almost no mechanical skill. On top of that, he carries two separate smoke tools, can create healing zones inside smoke clouds, and revives allies faster while restoring more HP.
That last part matters more than people think.
Every ticket counts during long Warfare matches, particularly when attacking, so bringing teammates back at nearly full strength provides enormous value throughout an entire round.
Uluru
Abilities
- Loitering Munition
- Quickset Cover
- Composite Incendiary
- Battle Hardened
Uluru is arguably the game’s best dedicated anti-vehicle Engineer.
His camera-guided missile is devastating against armored vehicles and helicopters, while Quickset Cover instantly creates solid protection almost anywhere on the battlefield.
Composite Incendiary gives him excellent area denial, burns enemies hiding behind cover, and even destroys other Quickset Covers.
Honestly, Uluru probably should have been the default Engineer instead of Shepherd.
Hackclaw
Abilities
- Signal Decoder
- Flash Drone
- Data Knife
- Silent Step
Information wins objectives.
Hackclaw’s Signal Decoder reveals enemy movement through cover and tracks multiple targets ahead, making it incredibly valuable when clearing buildings or breaking difficult chokepoints.
Knowing exactly where defenders are hiding often matters more than having perfect aim.
Her usefulness doesn’t end there.
Data Knife disables electronic equipment—including vehicle defensive systems like smoke launchers—and Silent Step makes flanking dramatically safer by reducing movement noise while increasing crouch speed.
A-Tier Warfare Operators
Vyron
Abilities
- QLL32 Crouching Tiger
- Dynamic Propulsion
- Magnetic Bomb
- Dynamic Auxiliary System
Vyron is dangerous once mastered, but his mobility demands much more precision than D-Wolf’s straightforward sprint boost.
Dynamic Propulsion allows explosive repositioning, while Magnetic Bomb threatens both infantry and armor. The downside is consistency—its throwing arc feels closer to C4 than a grenade, making it awkward during hectic fights.
Players comfortable with advanced movement will get far more value from Vyron than beginners.
Toxik
Abilities
- Dragonfly Swarm System
- Adreno-Boost
- Blinding Gas
- Swift Healing
Unlike Stinger, Toxik focuses on buffing teammates while disrupting enemies.
Dragonfly Swarm weakens opponents by damaging their senses and reducing maximum HP, while Adreno-Boost improves weapon handling, movement speed, and resistance to hit flinch for nearby allies.
Coordinated squads get the most out of her toolkit, especially when timing pushes together.
Sineva
Abilities
- EOD Set
- Grapple Gun
- Razor Wire Grenade
- Rear Guard
Season 8’s rework made Sineva significantly more flexible.
The combination of a ballistic shield and Grapple Gun already makes him unique, and now players can continue using weapons while carrying the EOD equipment.
Rear Guard also keeps the shield on his back when it’s not equipped, blocking incoming fire during rescues or retreats.
Luna
Abilities
- Detection Arrow
- Volt Arrow
- GE2 Frag Grenade
- Enemy Analysis
Luna offers another excellent reconnaissance toolkit.
Detection Arrow scans enemies beneath its flight path, while Enemy Analysis briefly marks anyone she damages.
Volt Arrow provides additional area denial, and frag grenades round out an already versatile kit.
The community still debates whether Luna or Hackclaw is the stronger Recon Operator, and both have convincing arguments.
Morse
Abilities
- Advanced Sonar Device
- Throwable Jammer
- Delayed Flashbang
- Sonic Sitrep
Morse revolves around gathering information.
His sonar reveals enemy numbers and pinpoints noisy opponents, while Throwable Jammer slows targets, disrupts vision, reduces hearing, and forces affected enemies to emit constant sound.
Season 10 slightly toned him down by increasing the Jammer’s cooldown and giving opponents more warning before activation, preventing him from reaching S-Tier again.
N-Two
Abilities
- Frost Launcher
- Cryo-Flask
- Homing Stun Grenade
- Permafrost
Season 10’s newest Operator immediately earns a strong spot.
Since movement dominates Warfare, slowing enemies is incredibly powerful.
Cryo-Flask blocks routes, Frost Launcher spreads freezing effects, and Homing Stun Grenades remove much of the precision normally required to land crowd-control abilities.
Permafrost gradually freezes enemies while also reducing vehicle handling, making him useful against infantry and armor alike.
B-Tier Warfare Operators
Nox
Nox feels almost designed for another game mode.
Silent Assault dramatically improves stealth, mobility, and interference with Recon gadgets, while lasting even longer when playing solo or after a teammate goes down.
The Whirlwind Disc can home onto enemies, although locking on takes precious time during fast-paced Warfare matches.
Flashbangs remain useful, but much of his toolkit shines brighter in Operations.
Shepherd
Shepherd is a dependable starter Engineer.
His suppression drone helps teams push objectives, Sonic Traps are surprisingly effective when defending capture points, and Sonic Defense provides welcome explosive resistance.
He’s reliable—but Uluru simply performs the Engineer role better when vehicles become the priority.
C-Tier Warfare Operators
Gizmo
Conceptually, Gizmo is fantastic.
In practice, not so much.
T.I.M. and Crawler Nest often get destroyed before accomplishing much, especially in massive firefights where dozens of players constantly shoot anything that moves.
His gadgets become noticeably stronger during desperate final objective pushes, but most matches don’t give them enough time to shine.
Raptor
Raptor’s reconnaissance drone offers impressive utility.
Wing Cam tracks enemies, Silver Wing scouts long distances, carries EMP grenades, and can self-destruct.
The issue isn’t the drone itself.
It’s finding time to use it.
During constant firefights, manually piloting a drone usually means not shooting your weapon—and that’s rarely worth it.
D-Tier Warfare Operators
Tempest
Tempest’s Emergency Evasion Device simply doesn’t justify its slot.
Creating an anchor point before teleporting back sounds clever, but it usually returns you to the exact location enemies already know.
Combat Roll and Drill Charge are genuinely solid abilities.
Unfortunately, the Operator’s defining skill remains too predictable to compete with stronger options.
Vlinder
Vlinder provides healing, smoke, revives, and defensive drones.
On paper, that’s excellent.
In practice, Warfare moves too quickly.
Most of her gadget animations take just long enough that teammates die before she finishes using them, making her feel noticeably slower than Stinger.
Best Operators for Operations
Operations completely changes the pace.
Instead of nonstop objective fights, every encounter risks losing your weapons, armor, ammunition, and valuable loot.
Information, stealth, and survival become dramatically more important.
Operations Tier List
| Tier | Operators |
|---|---|
| S | Luna, Hackclaw, Nox, Stinger |
| A | D-Wolf, Toxik, Vlinder, Morse, N-Two, Raptor |
| B | Gizmo, Shepherd, Uluru |
| C | Sineva, Vyron |
| D | Tempest |
Ability cooldowns differ slightly from Warfare, although exact values haven’t been officially documented.
S-Tier Operations Operators
Luna
Information is priceless in extraction shooters.
Detection Arrow quickly tells squads whether buildings are occupied, while Enemy Analysis shares enemy locations after landing shots.
Volt Arrow and frag grenades simply make an already outstanding Operator even stronger.
Hackclaw
Hackclaw becomes even more valuable here.
Signal Decoder safely checks nearby buildings before entering, Silent Step minimizes footstep noise, and Data Knife disrupts electronic defenses while marking targets.
Whether you play aggressively or cautiously, she fits almost every strategy.
Nox
Operations feels like the mode Nox was designed for.
Silent Assault allows quiet repositioning and flanks, Deep Trauma punishes healing, and his stealth-oriented abilities finally receive the slower pacing they need.
Experienced players can create enormous pressure with him.
Stinger
Healing matters even more when expensive gear is on the line.
Stinger still delivers reliable direct healing, self-healing, smoke support, and improved revives.
Operations also upgrades Expertly Rescue by removing debuffs that reduce maximum HP, making him arguably the safest Support pick available.
A-Tier Operations Operators
D-Wolf
Movement loses some importance compared to Warfare, but D-Wolf remains excellent whenever fights actually begin.
Better repositioning, escape potential, aggressive chasing, and two Triple Blaster charges instead of one keep him highly competitive.
Toxik
Well-organized squads get tremendous value from Toxik.
Dragonfly Swarm weakens enemy teams while empowering allies, and Swift Healing speeds up consumable use nearby.
She still demands teamwork, but coordinated groups can dominate fights with proper timing.
Vlinder
Operations finally slows the pace enough for Vlinder’s toolkit to shine.
Her drones become easier to manage, Bio Scan extends downed timers, and she can monitor teammates’ health while providing consistent healing.
She’s still more complicated than Stinger, but far stronger here than in Warfare.
Morse
Advanced Sonar Device becomes one of the most valuable reconnaissance tools available.
Knowing exactly how many enemies occupy a building often determines whether you push or retreat.
Throwable Jammer also becomes significantly more threatening during slower tactical engagements.
N-Two
Controlling movement inside buildings is incredibly powerful.
Cryo-Flask freezes doors shut, Homing Stun Grenades remain dependable crowd control, and Permafrost gradually locks enemies in place.
He’s still too new to confidently place above A-Tier, but his potential is obvious.
Raptor
Unlike Warfare, Operations actually gives Raptor time to scout.
Silver Wing identifies enemy squads before they notice you, Wing Cam tracks escaping targets, and Threat Detection warns when somebody lines up a shot.
Once bullets start flying, however, much of his toolkit becomes less impactful.
B-Tier Operations Operators
Gizmo
With fewer random bullets flying around, Gizmo’s drones survive far longer.
Crawler Nest performs especially well indoors by applying corrosion that increases bullet damage.
The downside remains unchanged: attentive opponents can simply destroy his gadgets before they accomplish much.
Shepherd
Shepherd becomes slightly stronger here thanks to defensive gameplay.
Sonic Traps help secure buildings during looting, while Sonic Paralysis makes enemy pushes far less comfortable.
Still, his toolkit reacts to threats rather than creating opportunities.
Uluru
Uluru loses much of his identity because Operations rarely revolves around vehicles.
Quickset Cover, Composite Incendiary, and Loitering Munition all remain useful, but without constant armor battles he no longer feels essential.
C-Tier Operations Operators
Sineva
Sineva’s shield, Grapple Gun, and Razor Wire sound fantastic together.
The reality is less convincing.
Operations rewards stealth and information more than loud frontline aggression. Pulling teammates into cover with the Grapple Gun is genuinely useful, but compared to Operators who constantly reveal enemy positions, Sineva struggles to keep up.
Vyron
Exceptional movement players can still perform well with Vyron.
Everyone else faces a different reality.
A poorly timed dash can throw you directly into another squad, instantly costing your entire loadout. Magnetic Bomb also remains difficult to use because of its limited throwing distance.
D-Tier Operations Operator
Tempest
Emergency Evasion Device still feels like the weakest ultimate ability available.
Yes, pre-placing an anchor before pushing effectively creates a tether with roughly 100 meters of safety, giving it some situational value.
The problem is predictability.
Experienced opponents know exactly where you’ll return, making it far too easy to punish the teleport. Combat Roll and Drill Charge remain useful tools, but they aren’t enough to lift Tempest higher when the centerpiece of her kit is also its biggest weakness.